Free Online Image Compressor: Reduce Image Size for Faster Websites
A practical guide to compressing images online for faster websites: WebP, AVIF, JPEG, PNG, resizing, quality settings, batch compression, and ZIP download.

Table of contents
Images make websites feel real. They show products, explain services, improve articles, and make landing pages easier to trust.
But images are also one of the most common reasons a website becomes slow.
According to the 2025 Web Almanac by HTTP Archive, the median home page reached 2,862 KB on desktop and 2,559 KB on mobile in July 2025. Images remain a major part of that page weight. In practice, this means a few oversized screenshots, hero banners, product photos, or blog thumbnails can quietly hurt loading speed, Core Web Vitals, and user experience.
That is why I built a free online image compressor: a browser-based tool for compressing images in batches, converting to WebP, AVIF, JPEG, or PNG, resizing large files, comparing before and after, and downloading everything as a ZIP.
Why image compression matters
Image compression reduces the number of bytes a browser needs to download.
That matters because users do not all visit from perfect networks. Some are on mobile data. Some are far from your server. Some open your website while multiple apps are running. A heavy image can delay the first useful view of the page.
For websites, smaller images can help:
- Pages load faster.
- Blog posts feel smoother.
- Landing pages become more responsive.
- Mobile visitors wait less.
- Hosting and bandwidth costs stay under control.
- Core Web Vitals become easier to improve.
web.dev explains image optimization as reducing network time by sending fewer bytes and serving images that are properly sized for the user's device. That is the practical goal: keep the image useful, but remove the unnecessary weight.
When should you compress images?
Compress images before you upload them to:
- Blog articles.
- Landing pages.
- Portfolio case studies.
- Product pages.
- Ecommerce galleries.
- Open Graph/social preview images.
- Admin dashboards.
- Documentation pages.
If the image is uploaded by a user, you can still compress it on the backend. But for manually published content, compressing before upload is the fastest habit to build.
Which format should you choose?
There is no single best format for every image.
Use this simple rule:
- WebP: good default for web images, usually smaller than JPEG/PNG.
- AVIF: often even smaller, useful when maximum compression matters.
- JPEG: good for photos when compatibility is the priority.
- PNG: useful for images that need transparency or sharp UI details.
web.dev recommends experimenting with WebP and AVIF because modern formats can often deliver similar visual quality with a smaller footprint than older formats.
The online image compressor lets you choose:
- Auto
- WebP
- AVIF
- JPEG
- PNG
That makes it easy to test which output works best for your image.
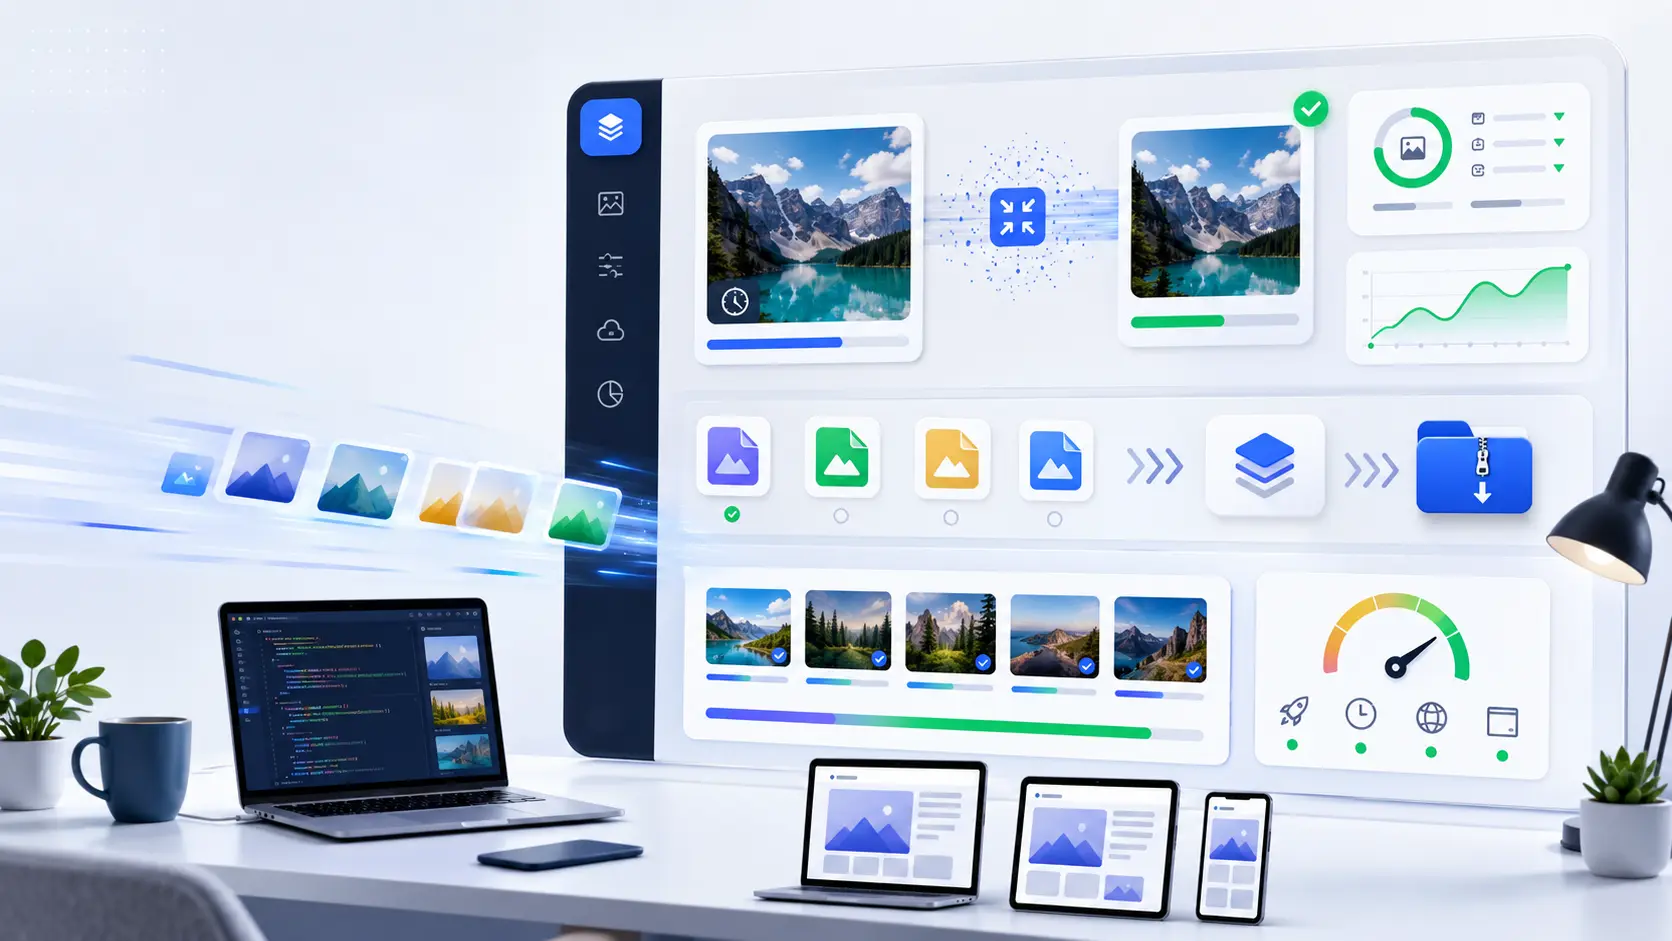
How to use the online image compressor
Go to Image Compressor, then:
- Drop images into the upload area or pick files manually.
- Choose the output format: Auto, WebP, AVIF, JPEG, or PNG.
- Adjust quality if needed.
- Set a resize width if the image is larger than necessary.
- Compress the images.
- Compare original and compressed versions.
- Download one file or download all compressed images as a ZIP.
The tool supports batch compression for up to 12 images, with each image up to 20MB. It supports JPEG, PNG, WebP, and AVIF.
Best settings for most websites
For everyday web publishing, a good starting point is:
- Format: WebP or Auto.
- Quality: around 80-88.
- Width: match the real display size.
- Blog thumbnails: 1200px to 1600px wide is usually enough.
- Full-width hero images: avoid uploading huge original files if the design does not need them.
The key is not to chase the smallest number blindly. A compressed image should still look clean. If text, UI edges, or product details become blurry, increase quality or choose a different format.
Image SEO still matters
Compression is not the only image optimization step.
Google's image SEO best practices also point to the importance of useful context, descriptive filenames, alt text, and relevant placement near the surrounding content.
Before publishing an important image, check:
- Does the file name describe the image?
- Is the image placed near related content?
- Does the alt text explain the image when needed?
- Is the image size appropriate for the page layout?
- Is the file compressed enough for mobile visitors?
- Is the image useful, not just decorative weight?
Good image optimization is a mix of performance and clarity.
A simple pre-publish image checklist
Before publishing a page, run this quick checklist:
- Compress every large image.
- Convert photos and article images to WebP or AVIF when suitable.
- Resize images that are much larger than their display size.
- Keep PNG only when transparency or crisp UI detail is needed.
- Add descriptive alt text for meaningful images.
- Avoid using huge images as decorative backgrounds.
- Test the page on mobile.
This small habit can make a website feel much faster without changing its design.
Final thought
Image compression is one of the easiest performance wins for a website.
You do not need a complex workflow to start. Compress images before upload, choose a modern format when possible, resize oversized files, and keep visual quality high enough for real users.
This free online image compressor is built for that exact workflow: quick, practical, batch-friendly, and focused on real web publishing.
Sources
Related articles
Related tools
Enjoyed this article?
Subscribe to the newsletter to get notified about new posts.